
Wireless room thermostats: a complete guide to saving energy, installation and selection in 2026
In recent years energy prices have settled at levels that are still a heavy burden for the average household. The year 2026 has brought new legislative requirements for the energy efficiency of buildings and stricter standards for the control of heating systems. If you have so far been using old mechanical thermostats or relying on central control with no individual regulation, you are probably paying for heat you do not even notice. One of the most effective ways of cutting your monthly heating costs straight away, without having to renovate the whole system, is to install wireless room thermostats.
This article is not just about selling products. It is a comprehensive guide that will help you understand how modern wireless systems work, why they matter more than wired solutions, how to choose the right model for your family and what you can achieve through automation. We will go through the technical details, the security of signal transmission and integration with existing boilers, and present specific solutions from leading manufacturers that are available in our range.
Why is heating the biggest energy consumer in the home?
Before we get into the technical details of wireless thermostats, we need to be clear about the context. In the average Slovak house or flat, heating accounts for as much as 60 % to 70 % of the total energy budget. The rest goes on hot water, electricity for lighting and appliances, and gas/electricity for cooking.
Most older houses have their heating system set to run, as they say, "flat out". This means that the boiler works according to the outdoor temperature or at maximum output as soon as it is switched on, and the radiators either have no heads at all or outdated mechanical thermostatic heads that may not be correctly calibrated. The upshot is that you have 24 °C in the living room (surplus energy), while it is 18 °C in the bedroom (discomfort) and 26 °C in the bathroom (waste).
A wireless room thermostat solves this problem by measuring the temperature in the room precisely and communicating with the boiler so as to switch it off the moment the required temperature has been reached. No cables, no complicated installation, no damage to the plaster. The whole process runs over a radio signal, which today is reliable enough to work even through concrete walls and between different floors.
The maths of savings: how much money will you really save?
Many customers ask us: "Will it really be worth it?" The answer is not just yes, but often yes by a large percentage. Studies and long-term monitoring of wireless thermostat users show the following results:
- You will save 15 % to 25 % on heating costs if you previously had no control in the individual rooms.
- You will save 10 % to 15 % if you had mechanical thermostatic heads that were not correctly set or were not working in sync.
- Comfort benefit: Fewer temperature swings, a more stable indoor climate, fewer draughts and better conditions for sleep.
Given current gas and electricity prices in 2026, with the price per kWh at levels that the ordinary customer feels keenly, an investment in a good-quality wireless thermostat often pays for itself within a single heating season. If we take an average household that spends 1 500 € a year on heating, a saving of 20 % means 300 € stays in your wallet. For that sum you can buy not only a thermostat but professional installation as well.
What is a wireless room thermostat and how does it work?
An ordinary room thermostat is a device used to maintain a constant temperature in a room. The classic difference between the "old" and the "new" solution lies in how the signal is transmitted to the boiler. Older systems required the thermostat to be physically connected to the boiler by two copper wires. That meant installation involved chasing cables into the plaster, which was costly, time-consuming and often did irreversible damage to the interior of the flat or house.
A wireless room thermostat consists of two main parts:
- Thermostat (transmitter): This is the device you mount on the wall in the living room, bedroom or kitchen. It contains a temperature sensor, a display, a battery and a radio transmitter. Its job is to measure the temperature and send an "on/off" or "modulate output" signal
- Receiving unit (receiver): This is a small device that is fitted directly in the boiler casing (or at its input). It receives the radio signal from the thermostat and then electrically switches the boiler circuit. It does not have to be mains-powered; battery power or a direct supply from the boiler terminals is often enough.
Communication takes place on a standardised frequency (usually 433 MHz, 868 MHz or 2,4 GHz depending on the model). These frequencies are designed to pass through common building materials – timber, plasterboard, brick and even thin concrete. The signal is encrypted, which means that your neighbour's thermostat will not interfere with your system and you will not interfere with theirs. Modern systems use technologies such as Rolling Code, which constantly change the transmission code, preventing hacking or the accidental triggering of someone else's device.
Figure: How a wireless thermostat works. The thermostat in the room measures the temperature and sends a signal straight to the boiler, which responds immediately.
The difference between a wireless and a wired solution
Many people think a wireless solution is less reliable than a conventional wired one. This is a myth that arose in the 1990s, when radio technology was still imperfect. Today the situation is entirely different. Let us look at a comparison in terms of practical use in 2026.
Installation and labour costs
Wired solution: Requires cables to be run from where you want the thermostat (e.g. the living room) all the way to the boiler (often in the cellar or in a plant room). That means drilling holes, chasing cables into the plaster, sticking on trunking, making good the plaster and repainting. The cost of labour can be as high as the price of the device itself.
Wireless solution: All you need is a drill, a screwdriver and a battery. You fix the thermostat to the wall (a single screw is enough) and fit the receiver in the boiler casing (often it simply attaches by magnet or with two screws). The whole installation takes 15-30 minutes and makes no mess.
Flexibility and measurement accuracy
Wired solution: The location of the thermostat is often limited by the distance from the boiler and the cost of cabling. People therefore install thermostats in hallways, where the temperature is unstable, or in rooms that are not representative of the house as a whole.
Wireless solution: You can have thermostats in every room. You can put one in the living room, a second in the bedroom and a third in the children's room. The receivers can all be on a single boiler, or each thermostat can have its own receiver for a separate circuit (if you have more than one boiler or zone valves). Measurement accuracy is much higher, because the sensor is located where people actually are, not where it is cheapest to run a cable.
Maintenance and expandability
Wired solution: If you need to add another thermostat, you have to run cables again. If a cable breaks, the fault is hard to locate.
Wireless solution: Adding a new thermostat is a matter of seconds. Just put batteries in the new device and pair it with the receiver. If something goes wrong, you can easily replace just one part without affecting the whole network.
How do you choose the right wireless thermostat for your needs?
Choosing the right thermostat is not just about price. You need to consider the type of heating system you have, the size of the house, how technically confident you are and whether you need intelligent automation. There are three main categories on the market:
1. Simple ON/OFF thermostats
These devices have a single function: when the temperature drops below the set value, they send a signal to switch the boiler on. When the temperature reaches the set value, they send a signal to switch it off. They are ideal for simple systems where basic control is enough. They are not suitable for condensing boilers, which need output modulation, or for heat pumps.
Recommendation: For older gas boilers without modulation and for simple blocks of flats.
2. Modulating thermostats (linear control)
These devices can send a signal that determines the boiler output. For example, if it is -10 °C outside and you want 21 °C in the room, the thermostat sends a signal for the boiler to run at full output. As the temperature approaches the target, the thermostat gradually reduces the output. This is crucial for modern condensing boilers, which are at their most efficient at lower outputs. They are also essential for heat pumps, which cannot simply be switched off and on, as that would accelerate wear on the compressor.
Recommendation: For all modern condensing boilers, heat pumps and solar systems.
3. Smart thermostats with Wi-Fi and an app
This is the most advanced category. As well as communicating wirelessly with the boiler, these devices also have a Wi-Fi connection. They let you control the heating from your smartphone from anywhere in the world, set programmes for each day of the week, use GPS location (geofencing) and integrate with systems such as Google Home, Amazon Alexa or Apple HomeKit.
Recommendation: For modern households that want maximum comfort and control over their energy.
Key parameters when choosing
- Power supply: Most wireless thermostats run on batteries (AA or CR2032). Check how many batteries the device uses and how long they last. Some models have a solar panel, which does away with the need to change batteries.
- Signal range: The usual range is 30-50 metres in open space. In concrete houses the range may be reduced. Choose a model with a high transmitter power (e.g. 2W or more) and the option of fitting external aerials.
- Sensor accuracy: Look for thermostats with an accuracy of ±0,5 °C or better. Cheap models have an accuracy of ±1,5 °C, which means the temperature will fluctuate over a wide range.
- Support for multiple receivers: If you have several boilers or zones, check whether one thermostat can control several receivers at once.
Overview of the best models on the market in 2026
To make your decision easier, we have put together an overview of specific models that are available in our range and have proved themselves in practice. These products meet the strictest standards and offer an optimum balance of price and performance.
Euroster 2006 TX: a classic of reliability
Euroster 2006 TX is one of the best-selling wireless thermostats on the Slovak market. It is a robust device that combines simple operation with high accuracy. It is ideal for households looking for a reliable solution with no unnecessary extras but with the emphasis on functionality.
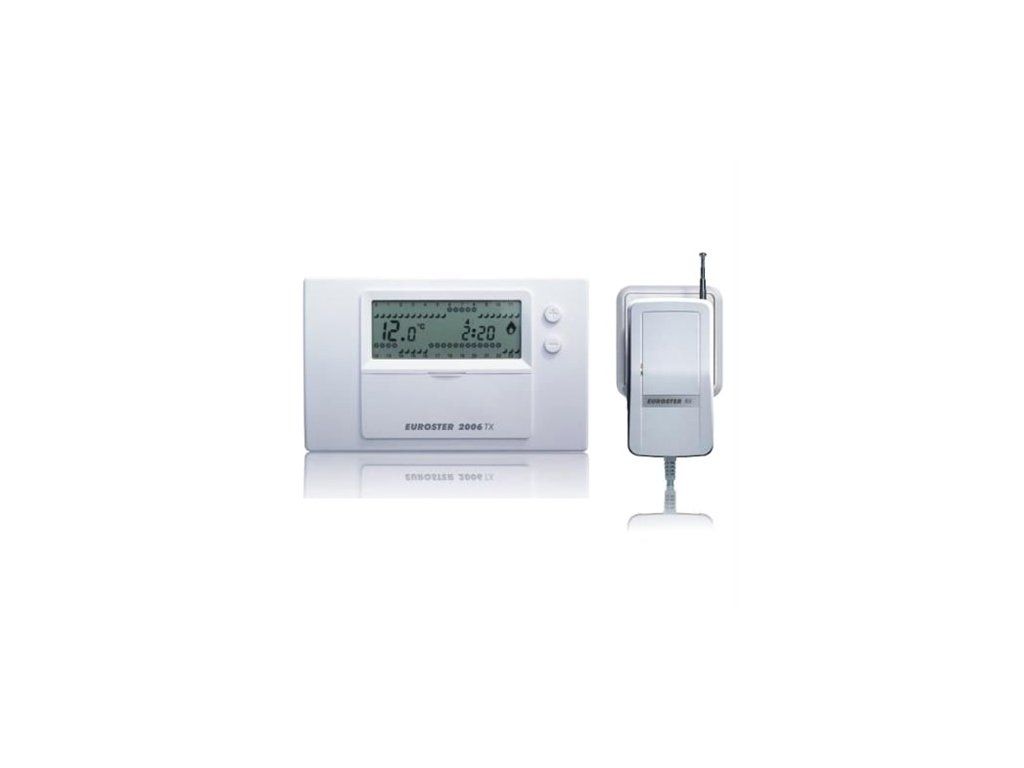
Euroster 2006 TX: simple design and reliability for everyday use.
Main features:
- Wireless transmission: Works on a frequency of 433 MHz with a range of up to 50 metres in open space.
- Intelligent memory: Lets you set a weekly programme with up to 6 temperature changes a day.
- Frost protection: Automatically raises the temperature to 7 °C if the system is at risk of freezing.
- Battery: Powered by a single AA battery, which lasts up to 12 months depending on use.
- Indicator: LED indication of battery status and signal reception.
Who we recommend it for: Families with children, older people and anyone who prefers simple controls without complicated set-up on a phone. This model is also ideal for blocks of flats where the heating needs to be modernised quickly and cheaply.
Would you like to buy this model? Click here to see the current price and availability of the Euroster 2006 TX.
Euroster 2026 TX: a more advanced version with a larger display
The successor to the popular 2006 model, the Euroster 2026 TX, brings several improvements that you will particularly appreciate in modern homes. It has a larger, easier-to-read display that shows not only the temperature but also the current time and day of the week. It also offers more advanced functions for optimising consumption.

Euroster 2026 TX: a large display and intuitive controls for maximum comfort.
Main improvements over the 2006 model:
- Large LCD display: Improved legibility from a distance and in dark rooms.
- More advanced programme: Up to 8 temperature changes a day can be set, with the option of a separate weekend programme.
- Frost protection and draught detection: The system automatically recognises a sharp drop in temperature caused by a draught and adjusts the mode.
- Battery replacement: The battery replacement indicator is clearer and gives advance warning.
Who we recommend it for: People who want more information on the display and need a more flexible programme for different days of the week. Ideal for detached houses with varying schedules (e.g. parents working shifts, children at home at different times).
Find out more about this model: View details of the Euroster 2026 TX.
SALUS 091FLRF: premium quality and modulation support
SALUS is a world leader in intelligent heating control. The SALUS 091FLRF model represents the pinnacle of its wireless solutions. It is designed for demanding users who need full control over their boiler and support for output modulation.

SALUS 091FLRF: a professional solution for condensing boilers and heat pumps.
Key features:
- 0-10V modulation: Direct communication with the boiler for smooth output control, which increases the efficiency of condensing boilers.
- Wi-Fi connection: Can be controlled via the SALUS Smart Home mobile app from anywhere in the world.
- Geolocation: Automatically switches the heating off when you leave the house and back on shortly before you return.
- Integration: Compatible with Google Assistant, Amazon Alexa and Apple HomeKit.
- High accuracy: Sensor with an accuracy of ±0,2 °C.
Who we recommend it for: Owners of modern condensing boilers, heat pumps and solar systems. Ideal for tech-minded users who want complete control over their energy from a smartphone.
Discover what this device can do: Buy the SALUS 091FLRF.
SALUS 2026TX: a compact solution with Wi-Fi
Another strong player in the SALUS portfolio is the SALUS 2026TX. It offers similar functions to the 091FLRF, but in a more compact design and with the emphasis on easy installation and integration into smart home systems. It is the ideal bridge between a traditional wireless thermostat and the modern smart home.
Main features:
- Wi-Fi connection: Full control via the app.
- Programming: Flexible weekly programmes with an import/export option.
- Open window detection: If the sensor registers a rapid drop in temperature, it switches the heating off automatically.
- Energy balance: The app provides an overview of consumption and savings.
For those looking for a modern solution with Wi-Fi: Find out more about the SALUS 2026TX.
Avansa 2007 TX and Avansa 2003 TX: reliability at a sensible price
The Avansa brand is known for its durability and affordability. The Avansa 2007 TX and Avansa 2003 TX models are the mid-range, offering an excellent balance between function and price.

Avansa 2007 TX: ergonomic design and reliability for everyday use.
Difference between the models:
- Avansa 2007 TX: Offers a more advanced programme with more temperature changes and a better display. Ideal for detached houses.
- Avansa 2003 TX: A simpler model for flats and smaller houses, where a basic temperature setting and a simple programme are enough.
Who we recommend it for: Households looking for a reliable solution without unnecessary luxury features but with the emphasis on build quality and a long service life.
Take a look at the Avansa range: Buy the Avansa 2007 TX or Buy the Avansa 2003 TX.
Installing a wireless thermostat: step by step
One of the biggest advantages of wireless thermostats is that you can install them yourself, even if you have no experience of electrical work. The procedure is simple and safe provided you follow the basic rules. Detailed instructions follow.
Preparation before installation
- Choose a location for the thermostat: Install it on an internal wall in the room you want to control. Avoid places in direct sunlight, near air vents, next to a fireplace or close to heat sources. The ideal height is about 1,5 metres above the floor.
- Choose a location for the receiver: The receiver should be installed as close to the boiler as possible. Most receivers are fitted in the boiler casing or on its rear. Check the manual for the specific model to find out whether any cables need to be disconnected.
- Switch off the power: Before starting any work on the boiler, always switch off the boiler's circuit breaker or isolate the supply at the consumer unit. Safety comes first.
Installing the thermostat (transmitter)
- Preparing the wall: If you are installing the new thermostat where an old one used to be, remove the old thermostat and the concealed cables. If it is a new position, drill holes for the mounting plate.
- Mounting: Fix the mounting plate to the wall with screws and wall plugs. Make sure it is level.
- Terminal: If the thermostat is battery-powered, insert the batteries into the compartment at the back. If it is mains-powered (some models), connect the cables in accordance with the diagram.
- Fitting: Place the thermostat on the plate and lock it into position.
Installing the receiver (at the boiler)
The procedure varies according to the type of boiler. Most often the receiver is fitted in the boiler casing.
- Access to the terminals: Open the boiler cover and find the thermostat terminals. They are usually marked "T", "TR" or "Room Stat", or carry a thermostat symbol.
- Breaking the circuit: Disconnect the original thermostat cables (if there was a thermostat) or connect the receiver cables in parallel with the original circuit. The receiver acts as a switch – when it receives a signal, it closes the circuit and switches the boiler on.
- Connection: Connect the receiver wires to the appropriate terminals. There are usually two wires: one for the live conductor and one for the neutral conductor (or for the switched conductor). Pay close attention to the wire colours and the markings on the receiver.
- Mounting the receiver: Fix the receiver to the wall or in the casing close to the boiler. Some receivers attach to a magnetic strip, which makes removal easier.
Pairing the devices
The final step is to pair the thermostat with the receiver. Most modern devices (Euroster, SALUS, Avansa) have an "Auto-pairing" function.
- Resetting the receiver: Press the button on the receiver (often marked "Learn" or "Pair") for 3-5 seconds until the indicator light comes on.
- Pairing the thermostat: On the thermostat, press the button combination (e.g. "Mode" + "Set") or press the "Pair" button on the back, if there is one.
- Verification: The indicator light on the receiver should flash and then stay on, which means the connection has been made.
- Test: Set the thermostat to a temperature lower than the current temperature. The boiler should switch on immediately. Then set a higher temperature and the boiler should switch off.
Figure: Installation and pairing diagram. The receiver is connected to the boiler and paired with the thermostat using the buttons.
Legislation and energy efficiency in 2026
In 2026 new regulations on the energy performance of buildings apply in Slovakia. The European Union has introduced the Energy Performance of Buildings Directive (EPBD), which aims to achieve climate neutrality by 2050. One of the key measures is the obligation to install intelligent control components in all new and renovated buildings.
This means that if you are planning to renovate your heating or replace your boiler, installing a wireless thermostat need not be merely an optional extra but may be required by law. What is more, many state grants and subsidies for upgrading heating systems are tied to meeting certain energy standards that cannot be achieved without intelligent control.
Energy label and certificates
Modern wireless thermostats help to improve a building's energy label. An energy certificate is mandatory when a property is sold or let. Proper heating control can lead to a marked improvement in the rating on the A-G scale, which may increase the market value of the property.
Tax relief and grants
In 2026 various support programmes are available that allow the cost of buying and installing energy-saving equipment to be deducted. Wireless thermostats fall into the category of "intelligent control systems", which are eligible for this relief. We recommend asking your accountant or designer which specific programmes are currently available.
Real-life examples: how people save thousands of euros
I do not want this article to remain purely theoretical. So here are a few real cases from our customers who installed wireless thermostats and recorded significant savings.
Case 1: Detached house in Bratislava (Euroster 2006 TX)
Mr Novák has a 150 m² detached house and a gas boiler. Before the installation the house had only mechanical thermostatic heads on the radiators, which were often incorrectly set. The temperature in the house fluctuated between 18 °C and 24 °C. After installing a Euroster 2006 TX wireless thermostat in the living room and setting a programme (a lower temperature at night and during the day when nobody is at home), he managed to cut gas consumption by 22 %. The annual saving was about 450 €.
Case 2: Block of flats in Košice (SALUS 091FLRF)
Mrs Kováčová lives in a 3-storey flat with a heat pump. Her heat pump tended to switch on and off frequently, which reduced its efficiency and service life. Installing the SALUS 091FLRF with 0-10V modulation made smooth control of the heat pump's output possible. The result was not only an 18 % reduction in electricity consumption but also a marked increase in comfort and quieter running of the system. She also made use of the geolocation function, which switched the heating off automatically when she left for work.
Case 3: Pensioners in Trnava (Avansa 2003 TX)
Mr and Mrs Svoboda, both retired, had trouble operating their old boiler. Their mechanical thermostats were complicated and often got it wrong. Installing a simple Avansa 2003 TX wireless thermostat brought them peace of mind. They have a clear display, large buttons and a simple programme. The temperature in their house is now a steady 21 °C, which is ideal for them. The saving was 15 %, which helped them cover other expenses.
Frequently asked questions (FAQ)
Can I install a wireless thermostat myself?
Yes, installing a wireless thermostat is straightforward and can usually be managed by anyone with basic skills with tools. You just need to drill, connect the cables to the boiler and pair the devices. However, if you have no experience of electrical work, we recommend consulting an electrician.
Is a wireless thermostat compatible with my boiler?
Most wireless thermostats are compatible with all types of heat source (gas, oil and electric boilers, heat pumps). The key point is that your boiler must be capable of being switched by a thermostat (thermostat contact). If you have a condensing boiler, we recommend a model with modulation (e.g. SALUS 091FLRF). To be on the safe side, check your boiler's specifications or ask a specialist.
How long does the battery in a wireless thermostat last?
Battery life depends on the model and how often it is used. Most modern thermostats use a single AA battery, which lasts 12 to 18 months. Some low-consumption models with a solar panel can last as long as 2-3 years. Always keep an eye on the low-battery indicator on the display.
Can I have several thermostats on one boiler?
Yes, you can. There are systems in which one receiver takes the signal from several thermostats (logical AND or OR). If at least one thermostat is calling for heat, the boiler switches on. This is known as "zone control" and lets you regulate the temperature in different parts of the house independently of one another.
What if I lose the signal or the thermostat disconnects?
Modern wireless systems are highly resistant to interference. If the signal is lost, the boiler usually carries on running according to the last command or goes into emergency mode (depending on the receiver settings). Most devices have an "auto-reconnect" function that automatically tries to restore the connection.
Does the thermostat need calibrating?
Most modern thermostats are factory-calibrated and need only minimal adjustment. However, if you feel that the temperature on the display does not match reality, you can use the calibration function in the device menu. Shifting the value by ±1 or ±2 °C is usually enough.
Conclusion: an investment in comfort and savings
In 2026 wireless room thermostats are a must for every household that wants to save money and improve its comfort at the same time. There is no longer any need to sacrifice the look of your interior for the sake of cables or to waste time on a complicated installation. With these devices you gain full control over your heating, you can operate it from the comfort of your sofa and you also help to protect the environment.
To finish, let us sum up the key points:
- Savings: You can save 15-25 % on heating costs.
- Comfort: A stable temperature and individual settings for every room.
- Easy installation: No cables, no damage to the plaster.
- Wide choice: From simple models (Euroster 2006 TX) to advanced smart systems (SALUS 091FLRF).
If you have decided to modernise your heating, do not hesitate – go for it. Choose the model that best suits your needs, and in just a few weeks you will be enjoying lower bills and a warmer home. May your heating be intelligent, economical and comfortable.
Browse the full range of wireless thermostats in the atria.sk e-shop and find the right solution for you.
Do you have a question about this topic?
Can't make up your mind, or dealing with a particular situation in your home? Write to us - we will be glad to advise.